
Bringing a new domain name to life is a satisfying moment. It’s the point where an idea stops being abstract and snd becomes a real, reachable destination on the internet. This article describes how to onboard a domain name for an additional WordPress website when you’re already a Hostinger customer.
‘Onboarding’ defined
First, what does ‘onboarding’ mean? When used in the context of a domain name, it is the process of making said domain name — an internet address or URL — into a reachable destination on the web. It’s the first of many steps in building a website that include registering your domain name, connecting it to your hosting account, and pointing DNS records to it. (The final step in the process is installing WordPress.)
Purchase a domain name
Like most businesses in this space, Hostinger lets customers buy domains directly from them, and the benefit of doing so is a smoother, easier onboarding process. However, the reasons not to do so are more compelling.
First of all, most people will change web hosts more often than they will change any of the domains for their websites. To simplify administration of your domain names, it’s wiser to choose a registrar that specializes in them. Otherwise, you will have domain names floating around in multiple places, which gets complicated.
Also, web hosts usually don’t have the most competitive domain name prices. Currently, a domain name ending in .com runs from $10 to $23, and Hostinger is near the top in terms of price.
Domain name prices
| Company | Regular price | Deal price | Min. Commitment |
|---|---|---|---|
| Cloudflare | $10.46 / yr. | $10.46 / yr. | 1 year |
| NameCheap | $14.98 / yr. | $11.28 / yr. | 1 year |
| Hostinger | $19.99 / yr. | $13.33 / yr. | 3 years |
| GoDaddy | $22.99 / yr. | $15.33 / yr. | 3 years |
Choose a registrar
With respect to registrars, we recommend GoDaddy and NameCheap. GoDaddy’s advantages are a wider library of domains and products available to meet their customers’ needs, and they have a reputation for exceptional customer service. NameCheap, as its name suggests, wins on price more than any other factor. They still offer many advanced domain features, however.
Enter Hostinger’s nameservers at your registrar
Once you purchase a domain name, you need to change its nameservers on the registrar’s website to those of your web host, i.e. Hostinger. Nameserver settings for your domain can usually be found under DNS Settings. Nameservers come in pairs. Hostinger’s nameservers are as follows:
- ns1.dns-parking.com
- ns2.dns-parking.com
DNS records are like a phone book for websites, and nameservers tell your browser where to look for the remainder of those settings, which will include your IP address and other important metadata.
DNS settings, including changes to nameservers, take a while — up to 24 hours — to propagate over the distributed worldwide network. It’s easier to continue setting your your website at your web host after the nameservers are pointing to Hostinger’s servers.
Your registrar has other settings you should consider activating for the domain name you just bought, chiefly among them domain privacy (which may be an add-on service, but it’s included at GoDaddy and NameCheap, but may not be turned on by default) and DNSSEC, a security option that keeps hackers from spoofing your domain name and impersonating you or your company. effectively impersonating you or your company.
Add new domain to Hostinger
It’s time to add your domain name to your web host account. At Hostinger, this is included in the process of creating a new website. If the nameservers haven’t propagated yet, however, Hostinger will assign a temporary domain name to your site until it can verify you own the domain name in question.
To add a new site, in Hostinger’s hPanel (an updated and more modern version of the cPanel in use at most web hosts), in the left sidebar, go to Websites, then select Add Website. Hostinger will want to know what platform you are going to use to build your site. We will choose WordPress.
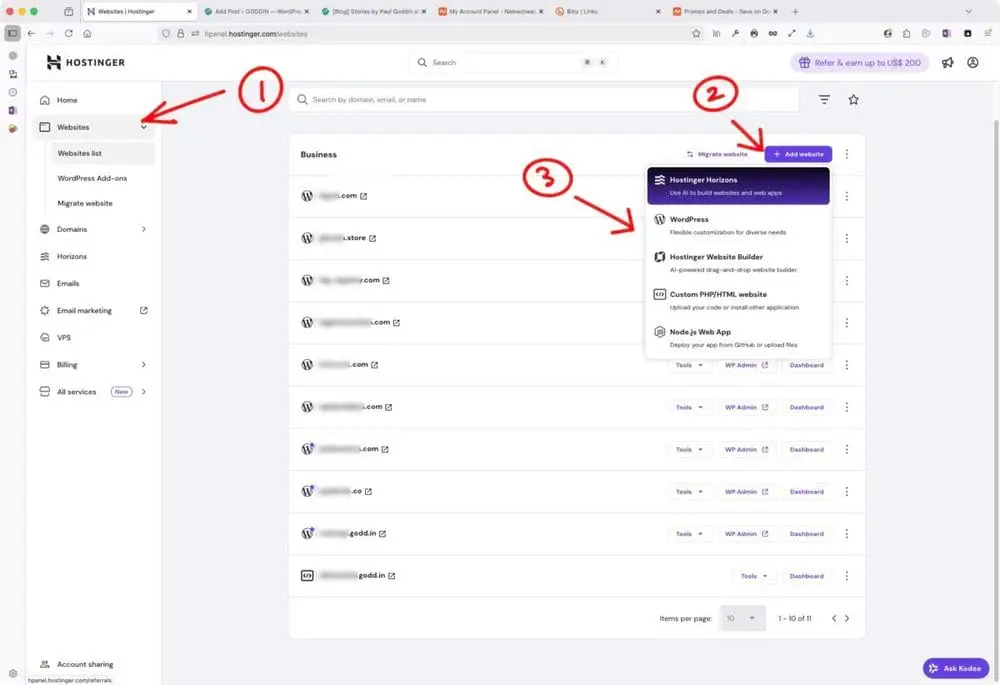
Next, Hostinger will prompt you to create login credentials for your WordPress account for this website, potentially autofilling your email and a random password for you. Hostinger will remember this login data to connect you from hPanel to your WordPress dashboard. Create or accept the auto-filled data.
Next, Hostinger will ask whether you want AI to build your site, if you prefer to start with a template, or just a blank slate. We will choose a template roughly matching the purpose of our planned site. This is just a springboard, everything can be changed or removed later.
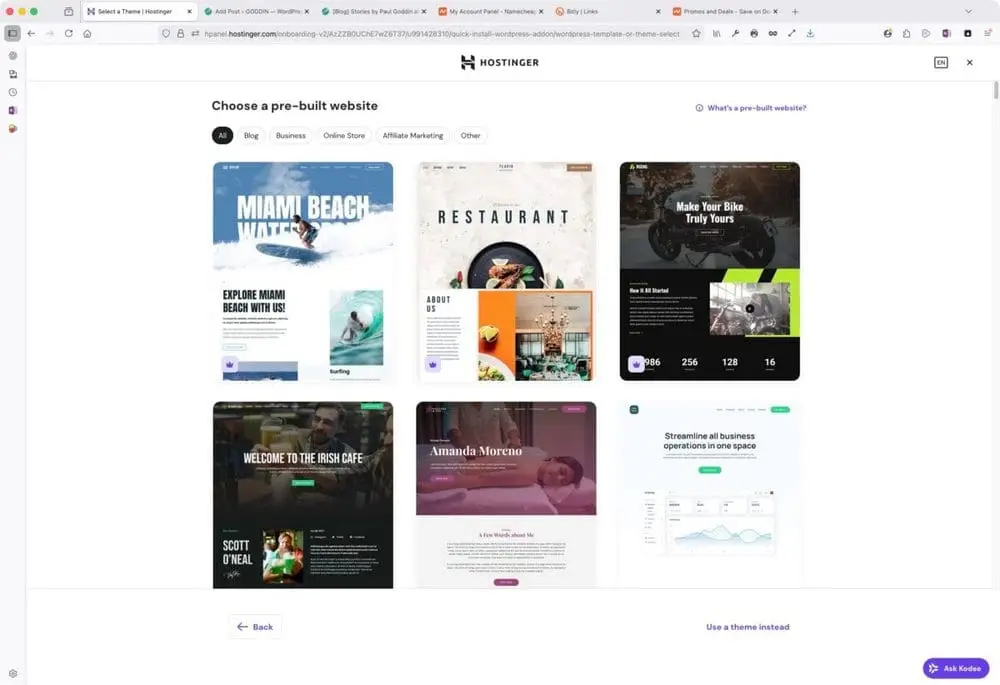
Next, Hostinger will prompt you to accept the inclusion of preselected plugins, some of which may be required for the template you chose. I prefer to start whenever possible with no plugins, adding the ones I want later. If a plugin installs that you didn’t want, it is easy to remove it later. Just make sure you do it the right way.
Finally, Hostinger will prompt you for your domain name. Enter it in the text box. If the nameservers haven’t propagated yet, WordPress will tell you that since your domain is registered elsewhere, you will need to verify you own it. Continue to the next step. WordPress will be installed on Hostinger’s servers with your theme and you will be transferred to the WordPress dashboard.